
This blog will explore the essential properties of Windows kiosks and restricted user experiences, Intune configuration profiles, and the best practices for managing these settings efficiently. Additionally, you can access the GitHub repository containing configuration files and templates to help streamline your setup process.
Kiosk devices help organizations in streamlining operations, improving customer service, and enhancing productivity. These specialized devices provide various benefits that can positively affect an organization’s efficiency and success.
Windows offers two different Kiosk options for public or specialized use:
| Kiosk Experience | Restricted User Experience |
| This option runs a single application in full screen. | This option loads the Windows desktop, but it only allows to run a defined set of applications. |
| People using the device can only use that app. | When the designated user signs in, the user can only run the apps that are allowed. |
| When the designated kiosk account signs in, the kiosk app launches automatically. | The Start menu is customized to show only the apps that are allowed to execute. |
Windows offers two different features to configure a kiosk experience:
| Assigned Access | Shell Launcher |
| Execute as a single Universal Windows Platform (UWP) app or Microsoft Edge in full screen. | This is used to configure a device to run a Windows desktop application as the user interface. |
| When the kiosk account signs in, the kiosk app launches automatically. If app is closed, it automatically restarts | The specified application replaces the default Windows shell (Explorer.exe) that usually runs when a user signs in. |
This article will examine various properties relevant to an Assigned Access configuration and provide an example configuration file suitable for a Kiosk Experience.
Assigned Access
Assigned Access is a Windows feature that you can use to configure a device as a kiosk or with a restricted user experience.
Requirements
To use a kiosk experience, User account control (UAC) must be enabled
To use a kiosk experience, you must sign in from the console. The kiosk experience isn’t supported over a remote desktop connection.
| Edition | Assigned Access support |
| Education | ✅ |
| Enterprise | ✅ |
| Enterprise LTSC | ✅ |
| IoT Enterprise | ✅ |
| IoT Enterprise LTSC | ✅ |
| Pro Education | ✅ |
| Pro | ✅ |
Create Assigned Access Configuration Profile
The Assigned Access configuration file comprises the following key properties:
- Versioning
- Profiles
- Configs
Versioning
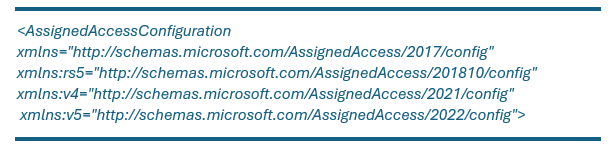
The Assigned Access configuration XML includes a version in the root element. This version determines the schema for validating the XML file and specifies the available configuration features.
| Version | Alias | Namespace |
|---|---|---|
| Windows 11, version 22H2 | v5 | http://schemas.microsoft.com/AssignedAccess/2022/config |
| Windows 11, version 21H2 | v4 | http://schemas.microsoft.com/AssignedAccess/2021/config |
| Windows 10 | v5 | http://schemas.microsoft.com/AssignedAccess/202010/config |
| Windows 10 | v3 | http://schemas.microsoft.com/AssignedAccess/2020/config |
| Windows 10 | rs5 | http://schemas.microsoft.com/AssignedAccess/201810/config |
| Windows 10 | default | http://schemas.microsoft.com/AssignedAccess/2017/config |
Example value:
A configuration file may include multiple profiles. Each profile is distinguished by a unique Profile Id and, optionally, a Name.
| <Profiles> <Profile Id=”{ 8ec27816-1661-4e62-966c-c083cd68e7d5 }” Name=”Microsoft Learn example”> <!– Add configuration here as needed –> </Profile> </Profiles> |
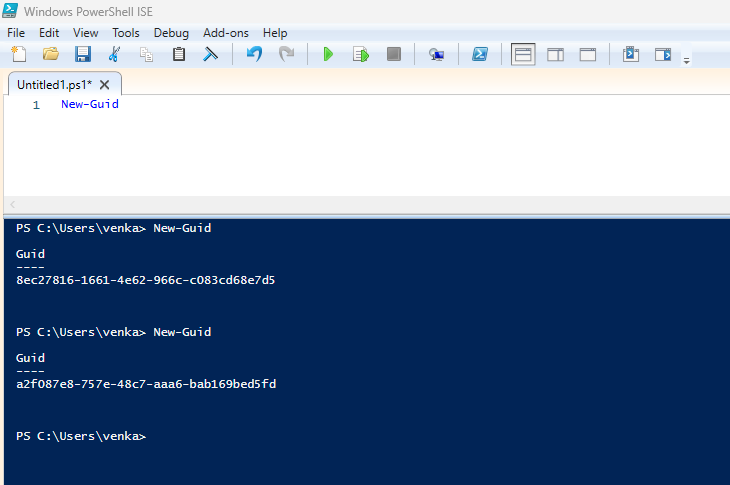
Profile ID (GUID) Generator
The Profile Id must be unique in the XML file. Use the PowerShell cmdlet New-Guid to create a GUID.
Types of Profiles
| Profile Types | Details |
| KioskModeApp | This is used to configure a kiosk experience. Users assigned this profile run either a Universal Windows Platform (UWP) application or Microsoft Edge in full-screen mode. |
| AllAppList | This profile configures a restricted user experience, giving users access to the desktop with specific apps on the Start menu. |
KioskModeApp Properties
The assigned access configuration profile will include the following kioskmodeapp properties.
| Property | Description | Details |
| AppUserModelId | The Application User Model ID (AUMID) of the UWP app. | Refer the MS article Find the Application User Model ID of an installed app. |
| v4:ClassicAppPath | The complete path to a desktop app’s executable file. | This is the path to the desktop app used in kiosk mode. |
| v4:ClassicAppArguments | Arguments for the desktop app. | This property is optional |
AllAppList
This list may include both Universal Windows Platform (UWP) applications and desktop applications. When the multi-app kiosk configuration is implemented on a device, AppLocker rules are created to permit the applications specified in the configuration.
The following is a list of properties included in the AllAppList configuration.
| Property | Description |
| AppUserModelId | The Application User Model ID (AUMID) of the UWP app. |
| DesktopAppPath | The full path to a desktop app executable. |
| rs5:AutoLaunch | A Boolean attribute to specify if the app (whether desktop or UWP) should launch automatically when the user signs in. |
| rs5:AutoLaunchArguments | The arguments to be passed to the app that is configured with AutoLaunch. |
Start menu customisations
To establish a restricted user experience profile (AllAppList), it is necessary to define the Start layout. The Start layout includes a list of applications that are pinned to the Start menu.
To create a customized Start layout, the most efficient method is to configure the Start menu on a test device and subsequently export the configured layout for deployment.
Taskbar customisations
The Taskbar can be customized by creating a custom layout and incorporating it into your XML file.
The following table outlines the configuration items that will be incorporated into an XML file.
| Configuration Items | Properties |
| AllAppList | <AllAppsList> <AllowedApps> <!– Add list of Apps and arguments if applicable –> </AllowedApps> </AllAppsList> |
| Start menu | <v5:StartPins> <![CDATA[ <!– Add your exported Start menu JSON configuration file here –> ]]> </v5:StartPins> |
| Taskbar | <Taskbar ShowTaskbar=”true” /> <v5:TaskbarLayout><![CDATA[ <!– Add your exported Taskbar XML configuration file here –> ]]> </v5:TaskbarLayout> |
Demonstration of Kiosk Functionality
Organizations might need to configure a single app Kiosk with options for full screen mode or private browsing and restricted URL access.
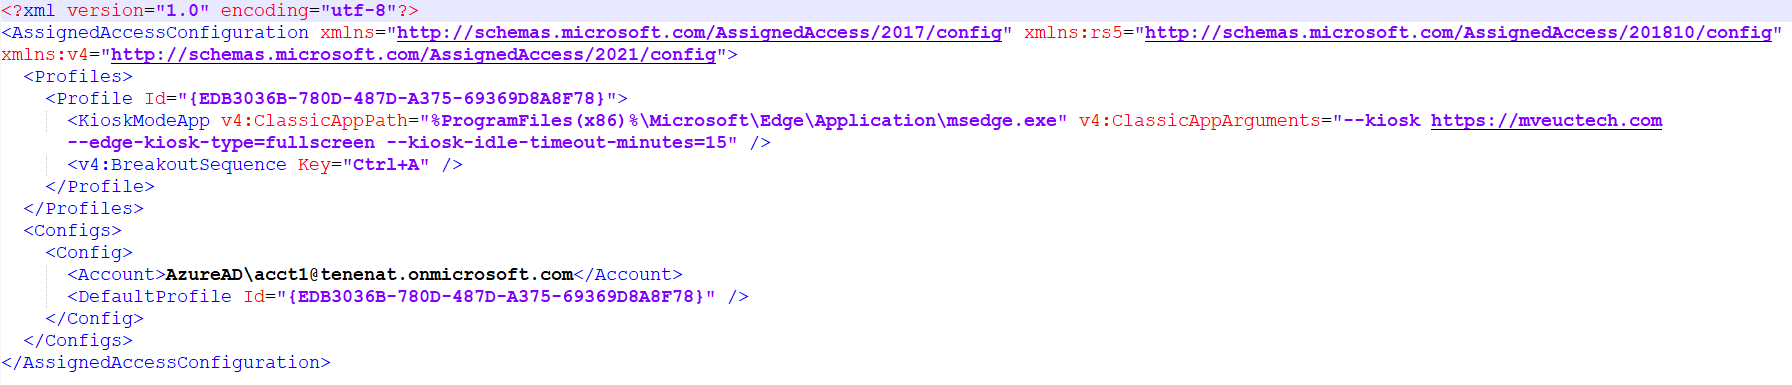
Full screen mode
The XML file provided below will assist in configuring a single application kiosk mode with full-screen functionality.
Private Browsing Mode
The XML file provided below will assist in configuring a single application kiosk mode with private browsing functionality.

Account Type
In the preceding examples, I have used the Entra account to publish the kiosk application.
You can use a local account, Domain user account, or Entra account. The table below lists each account type and their configuration properties that can be used in the XML file.
| Account Type | Configuration Properties |
| Entra Account | <Account>AzureAD\user@contoso.onmicrosoft.com</Account> |
| Domain Account | <Account>contoso\user</Account> |
| Local Account | <AutoLogonAccount rs5:DisplayName=”MS Learn Example” /> |
For more information on edge browse kiosk properties, refer the https://learn.microsoft.com/en-us/deployedge/microsoft-edge-configure-kiosk-mode#use-kiosk-mode-features
How to apply Assigned Access for Kiosk Mode Application
Sign in to the Microsoft Endpoint Manager admin center.
Go to Devices > Windows > Configuration Profiles.
On Windows Configuration Profiles window, select Create Profile.
On the Create a Profile window, select Platform as Windows 10 and later. Select profile type as Templates and select Custom. Click Create.
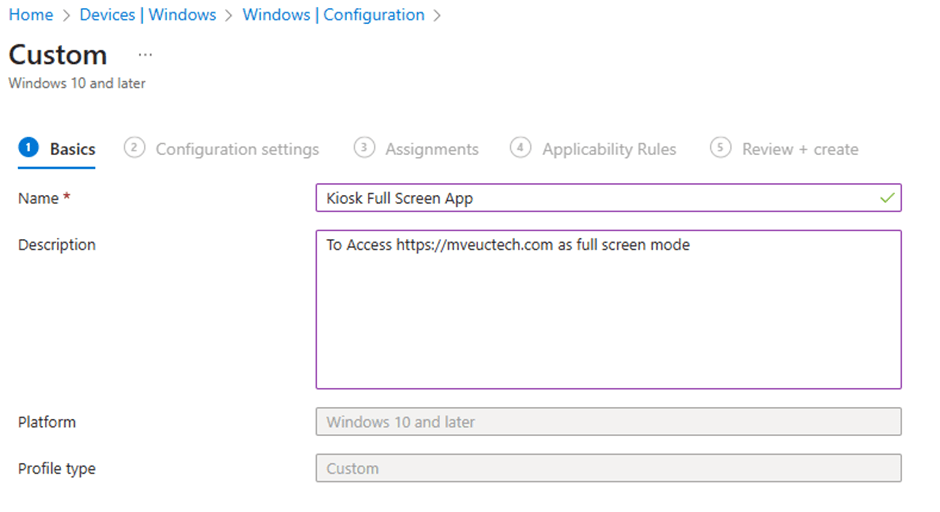
On the Basics tab, specify the name of the profile as Kiosk Full Screen App, and add a profile description (as a best practice). Click Next.
On the Configuration Settings section, in OMA-URI Settings, click Add and provide the below configuration details.
| Configuration Items | Properties |
| Name | Kiosk Full Screen |
| Description | For Full Screen mode App Configuration |
| OMA-URI | ./Vendor/MSFT/AssignedAccess/Configuration |
| Data Type | String (XML) |
| Custom XML | Select the XML that generated on above section |
In the Assignments window, choose the device group to target with this policy. Click Add groups and select a device group. Click Next.
In the Applicability rules section, select if you want to apply on specific rules or leave as blank and click Next
In the Review + Create section, review all the settings configured and select Create.
Once policy create successfully, based on the device sync, these settings will be applied and that will open Kiosk full screen mode application.
Same way you can create an Intune configuration profile for Private Browsing profile and apply to specific device group.
For a zero-trust environment, you can restrict the access of sites that users can access via the private browser through the Intune configuration profile.
How to apply Block and Allow URL restrictions for an Edge Browser
We will look on how to configure the restrictions.
Sign in to the Microsoft Endpoint Manager admin center.
Go to Devices > Windows > Configuration Profiles.
On Windows Configuration Profiles window, select Create Profile.
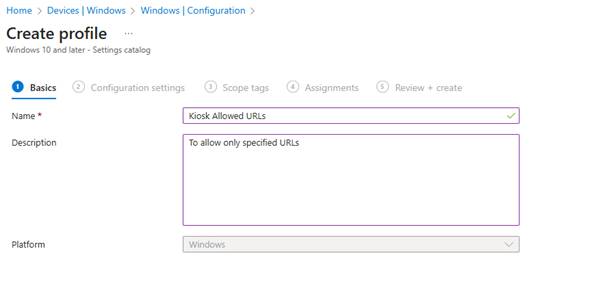
On the Create a Profile window, select Platform as Windows 10 and later. Select profile type as Settings catalog. Click Create.
On the Basics tab, specify the name of the profile as Kiosk Allowed URLs , and add a profile description (as a best practice). Click Next.
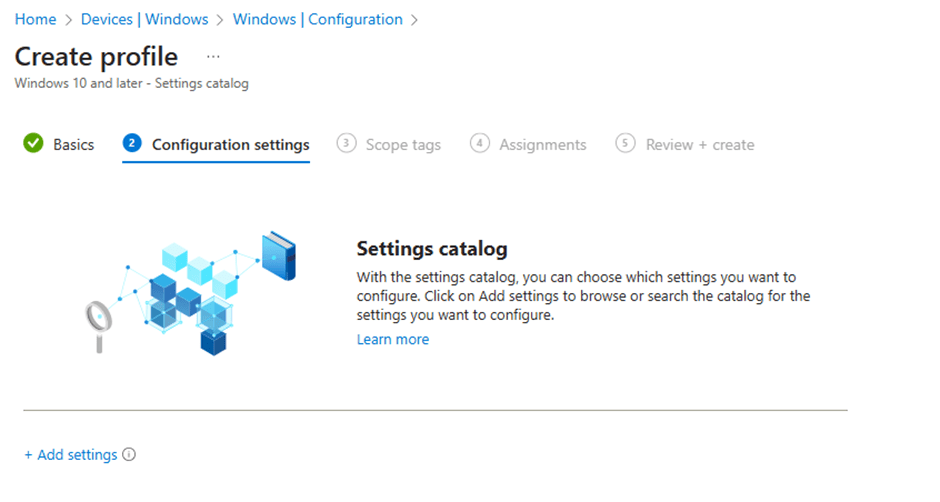
On the Configuration Settings section, under Settings Catalog, click Add Settings.
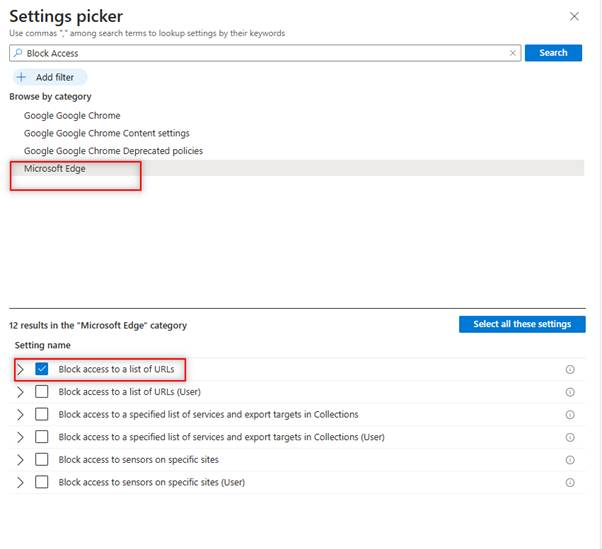
On the Settings picker window, type “Block Access” in the search box and click Search. From the search results, select Microsoft Edge. Now select Block access to a list of URLs setting.
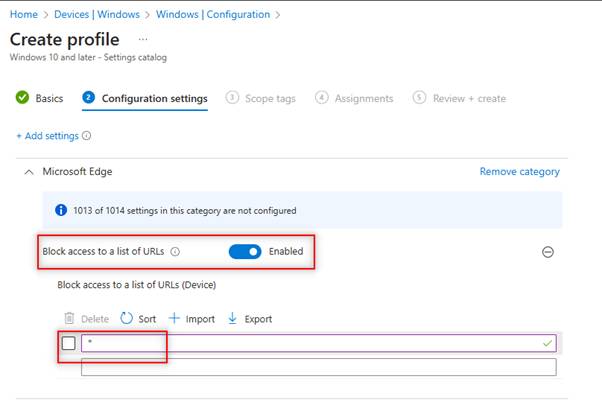
To block URLs except allowed, enable the policy setting “Block access to a list of URLs“ and configure * on Block access to a list of URLs (Device).
Again, on Settings picker window, type “Allowed URLs” in the search box and click Search. From the search results, select Microsoft Edge. Now select Define a list of allowed URLs setting.
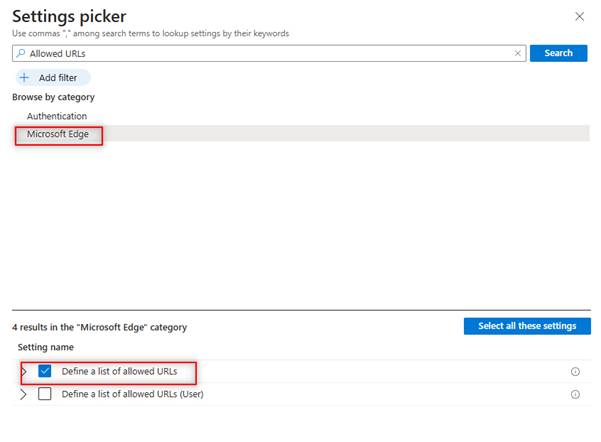
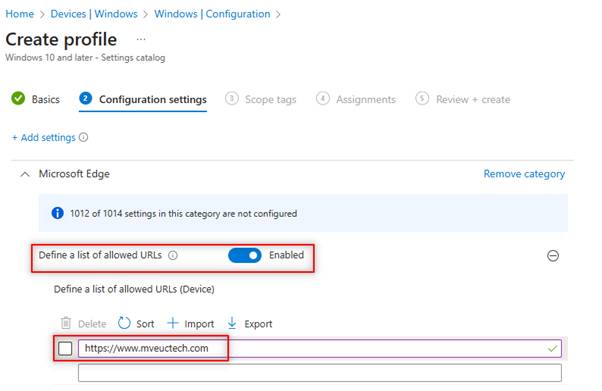
To allow URLs, enable the policy setting “Define a list of allowed URLs “ and configure the required URLs on Define a list of allowed URLs (Device).
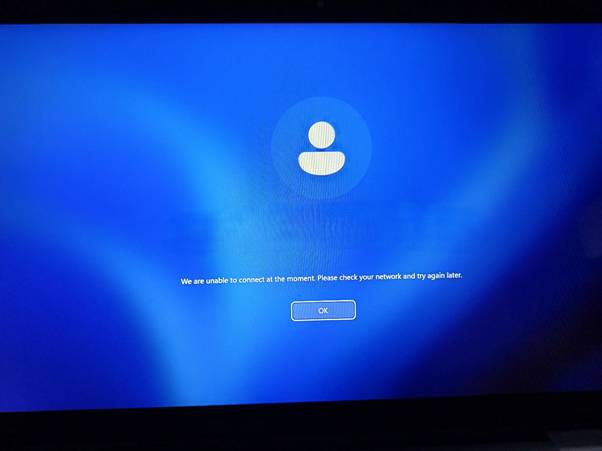
Once policy create successfully, based on the device sync, these settings will be applied and that will block URLs other than allowed.
Please note: In my environment, these settings are configured for a shared device that is not associated with any specific users. Consequently, the settings are applied at the device level. However, if you are configuring settings for a device associated with a user, use the user-level settings.
If you have specific scopes, select them; otherwise, leave it as Default in the scopes section and click Next.
In the Assignments window, choose the device group to target with this policy. Click Add groups and select a device group. Click Next.
In the Review + Create section, review all the settings configured and select Create.
Reference Files
You can find all relevant configuration files in my GitHub repository.
In next blog, we will look Multi App or AllAppList configurations and settings.


Leave a comment