Intune offers various profile options to control local storage access on devices. Some options are applied at the device level, while others are for the user level. In environments like shared devices or kiosks, it may be necessary to limit access specifically to the user level. This discussion will focus on how to implement user-level restrictions using the Set Allowed Folder Locations (User) setting.
The Set Allowed Folder Locations (User) setting in Microsoft Intune allows to define specific folders where users can store and access files while restricting access to other locations. This policy helps enforce data security, prevent unauthorized file storage, and ensure compliance with organizational guidelines. By configuring this setting, admins can limit file access to approved directories, enhancing control over sensitive data while maintaining a seamless user experience.
The below table provides the list of restriction categories that can be applied to end users.
| Restriction Categories |
| Access to all folder locations. |
| Documents, Pictures, Downloads. |
| Desktop, Documents, Pictures, Downloads. |
| Desktop, Documents, Pictures, Downloads, Network. |
| This PC, Desktop, Documents, Pictures, Downloads. |
| This PC, Desktop, Documents, Pictures, Downloads, Network. |
We will see on how to achieve the Set Allowed Folder Locations through Microsoft Intune.
Configurations in Microsoft Intune
Sign in to the Microsoft Endpoint Manager admin center.
Go to Devices > Windows > Configuration Profiles.
On Windows Configuration Profiles window, select Create Profile.
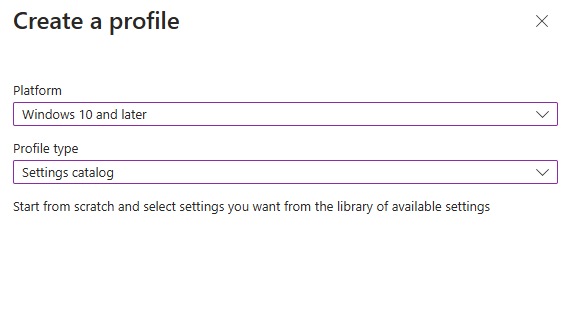
On the Create a Profile window, select Platform as Windows 10 and later. Select profile type as Settings catalog. Click Create.
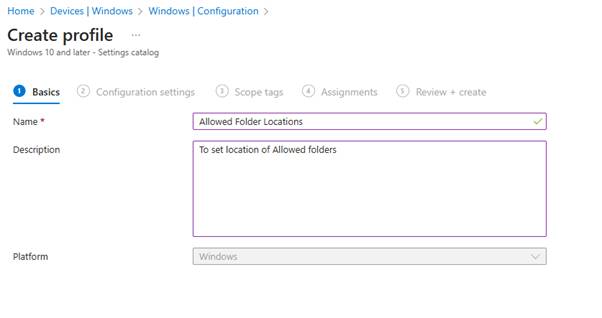
On the Basics tab, specify the name of the profile like Allowed Folder Locations, and add a profile description. Click Next.
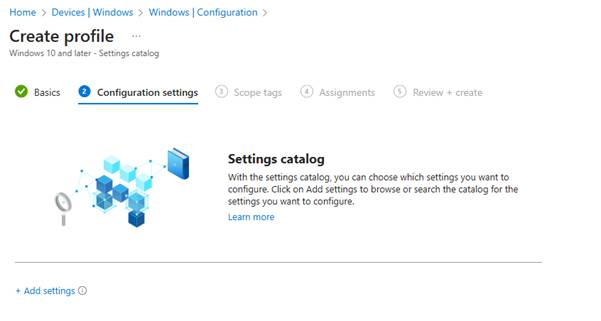
On the Configuration Settings section, under Settings Catalog, click Add Settings.
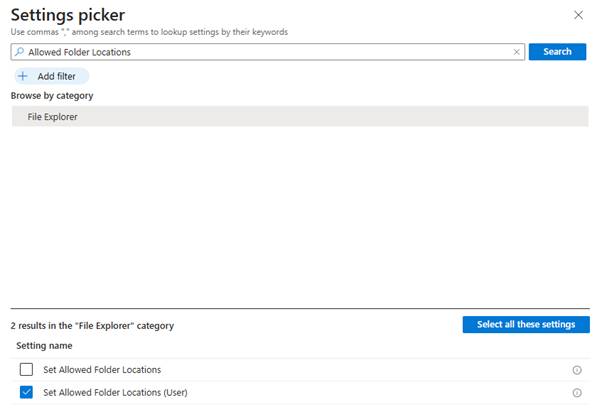
On the Settings picker window, type “Allowed Folder Locations” in the search box and click Search. From the search results, select Allowed Folder Locations (User). Now select the required setting.
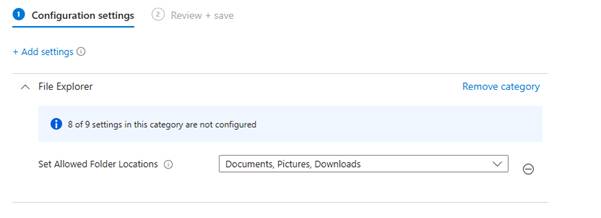
To limit the minimum access, select one of the restriction categories from the above table mentioned in the previous section. In my environment, I have selected “Documents, Pictures, Downloads“.
If you have specific scopes, select them; otherwise, leave it as Default in the scopes section and click Next.
In the Assignments window, choose the user group to target with this policy. Click Add groups and select a user group. Click Next.
In the Review + Create section, review all the settings configured and select Create. Once the policy is created successfully, based on the sync, these settings will be applied and that will allow only specified folder access.


Leave a comment